How to grow mason jar herb garden!

Hi guys! Today I am going to start a series about growing a garden indoors for people who don’t have an outdoor garden and/or for anyone who wants to grow a garden indoors. Let’s get started!

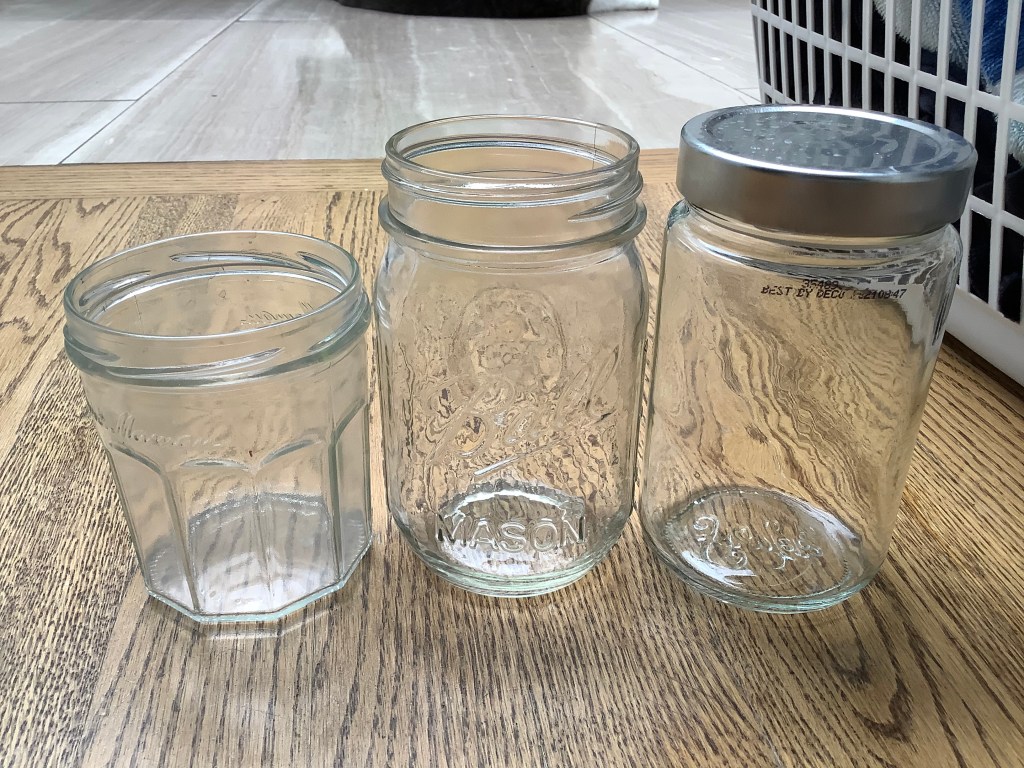
The first step to grow herbs in mason jars it to (obviously) get a mason jar. Your mason jar could be anything from a cleaned jam or salsa jar, to a store bought jar. I like to use recycled jam, salsa, etc. for growing my herbs inside.

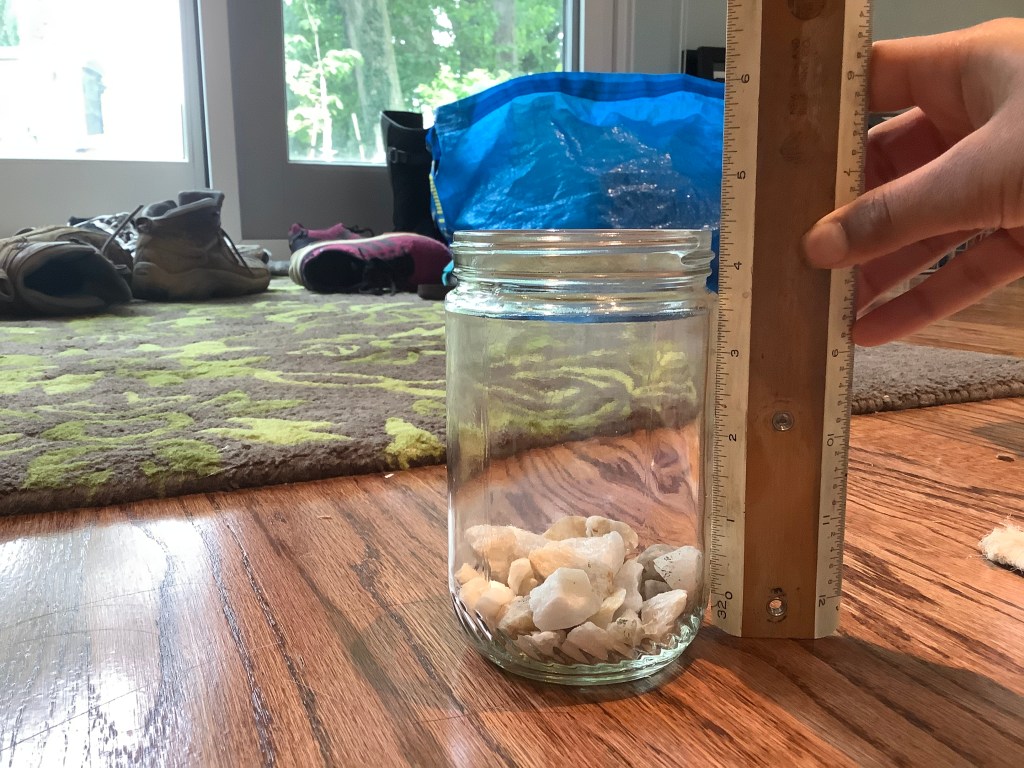
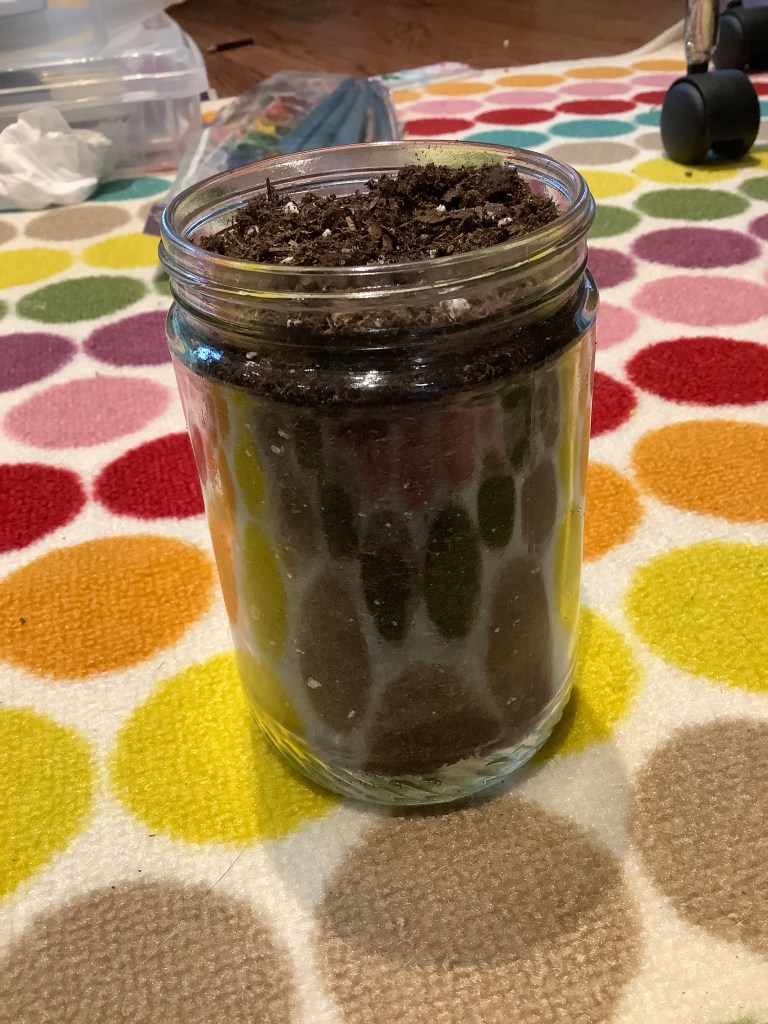
Next, we need some soil and drainage material. The drainage material helps to hold the excess water from the plant‘s soil so the roots do not rot. Drainage material can be rocks, shells, or broken terra-cotta pieces. When you get your soil, it’s important to buy potting mix because if you just get it from outside, it can have bugs, other seeds, and more things you don’t want in your mason jar herb garden. To fill your mason jar, place your drainage material on the bottom to about 1/2 to 1 inch high.

Then, take your potting mix and fill your jar till the soil level is around where the cap screws on.


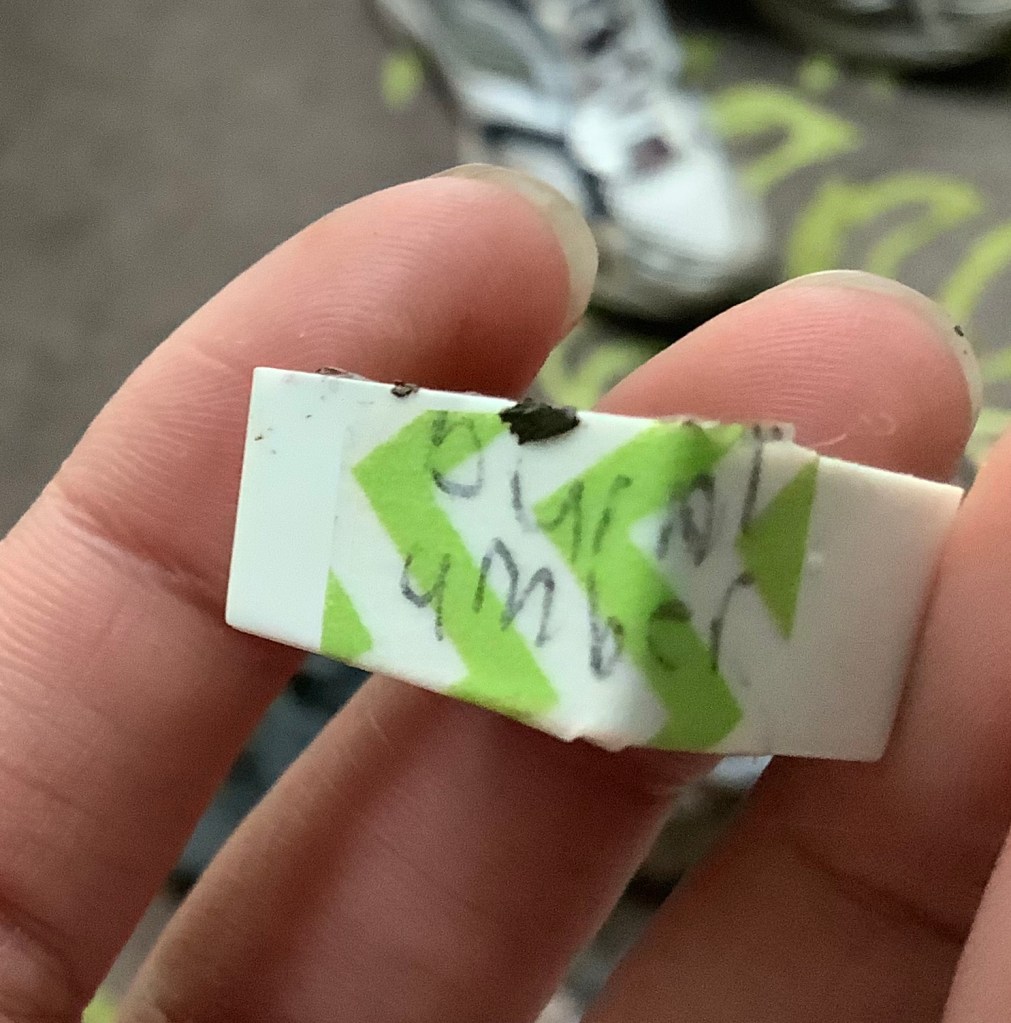
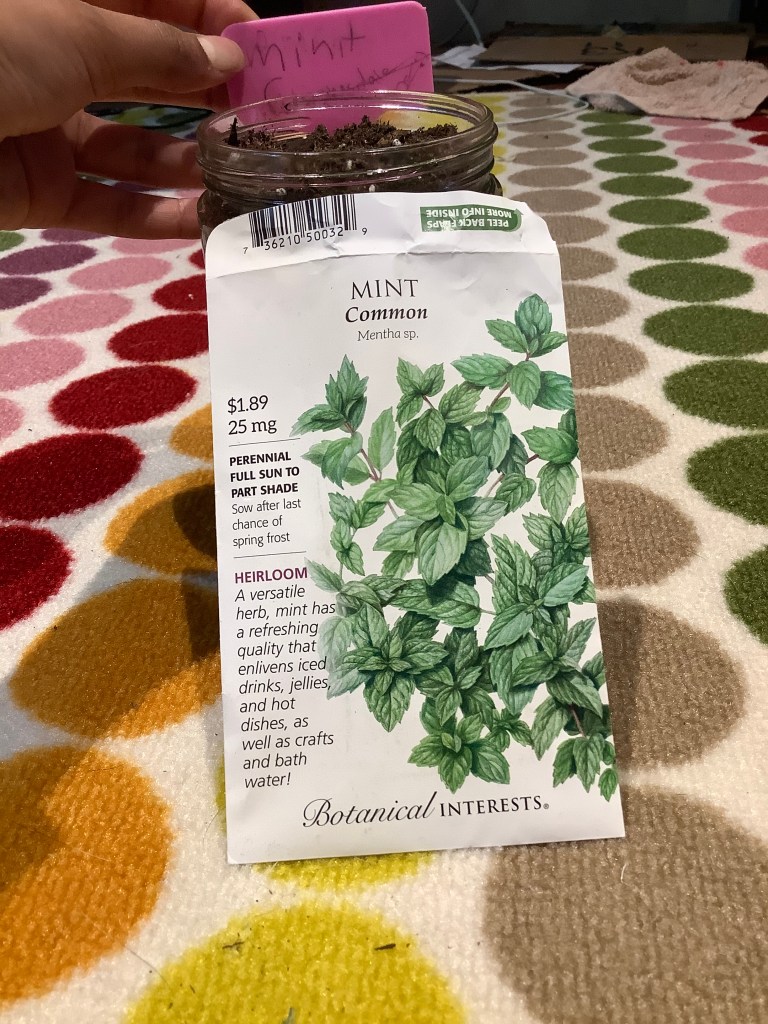
After your mason jar is filled, chose the type of herb seeds you want and plant them according to the packet they came in. Plus, don’t forget to label your jar so you know what is inside it!

After you plant your seeds, gently water them and place your mason jar in a sunny area. Most herbs like full sun, which it 6+ hours of sun. Depending on how big your mason jar is, you should water your plant every other day to every day.

Thanks for reading today’s post! Keep a lookout for an update on my herbs, and my next post. See you then!

How to set up a watercolor pallet! (Part 2)

Hey guys! I am going to try a new posting schedule – every Friday and Monday. Plus if I have the time, I might add extra posts in the middle. Now let’s get started!

It’s time to finish setting up our watercolor pallet! Today we are going to label our colors and make a color reference. Labeling your colors makes everything easier because that way it’s easy to match your colors to your color chart. Plus, the color chart is important because when the watercolors in your pallet are dry, they tend to not look the same when they are painted on paper.

First, let’s start by labeling our pans. I used a piece of washi or masking tape and stuck it to the pan with the color name on it, so I can take it off and change the color if I wanted to.

Once that is done, it’s time to make our color reference or color chart!
To start, cut a piece of watercolor paper that fits inside your pallet.

If you want to make yours simple all you have to do is make little swatches of each color in the order you want them in your pallet, and once they’re dry, you can just write the color names.

I like to take mine to the next step, and make it adjustable and waterproof! If you want to learn how to do that, keep on reading.

Now it’s time to make our more complicated color reference. To start, cut a piece of watercolor paper that fits inside your pallet. Then, on a separate piece of watercolor paper, Make all the color swatches and quickly write the color name so you don’t forget. Then, while that is drying, take the watercolor paper that is cut to fit your palate, and cover it with packing tape.

Once that is done, cut little color blocks out of your swatches. (If they are wet, they may tear) Also, write small color names to fit with your now cut out color swatches. After that is finished, take your packing tape, or normal tape, and “laminate” your swatches with their color tag. (Make sure that the back is also covered)

Next, take some glue dots and stick them on the back of your swatches and then put them on your laminated cut out piece of watercolor paper. Arrange them till you are happy with how it looks.

You can also make little tape rolls and use those as an alternative to the glue dots.

Once you have your color chart, you’re done! Now you can see what every color truly looks like, and have the ability to rearrange them without having to make a new chart! See you soon!

How to press flowers and leaves

Today we are going to learn how to press flowers. Pressed leaves and flowers are good for cards and crafts because if you press them properly, most flowers and leaves will keep their color for some time.

The first step to pressing flowers and leaves, is to (obviously) choose your leaves/flowers.

FUN FACT! You can press more than just flowers and leaves, but today I’m gonna show you how to press these. …..haha, get it? 🙂

The time in the day you pick your leaves and flowers is important. Make sure when you take your leaves/flowers, they are dry. Like after the sun has evaporated the morning dew, but before the evening rain shower. Also the leaves or flowers you take, should be relatively thin and not super thick. It’s OK if the flowers or leaves are thin and they’re in a 3-D shape, but the big, thick. Leaves and flowers just do not press well.

Once you have your things to press, take a heavy, thick book that is not important to you, (you can use multiple) and open up to the very last pages. Then, grab two tissues and place the first one on the page that you’ve opened up to. Once you’ve done that, you can take your flowers and leaves that you’ve decided to press and arrange them on the tissue in the way that you would like them to be dried. FUN FACT! Once they are pressed, most leaves and flowers are as thin, or thinner than paper! Here is how I laid my flowers out. The way you lay them out is how they are going to look once they’re finished pressing.

After you’ve laid out all of your flowers and leaves, gently place your second tissue on top of them and quickly close the book. If you have more heavy books, immediately put them on top of the book that you have your leaves or flowers in.

Most leaves and flowers take up to two weeks to a month to dry. It’s best to check on your leaves and flowers every week by opening the book and gently peeling them off the tissue to make sure they don’t stick. Once your flowers and or leaves are paper dry and paper thin, they are finished pressing! Here is how some of my flowers looked once they were pressed.

I hope you enjoyed today’s post! Keep a lookout for my herb drying rack tips and tricks coming soon!

You can use pressed flowers and leaves to decorate journal pages like I did here. You can also use them on cards which can be useful especially because Mother’s and Father’s Days are coming up!


Decorating our herb drying rack! (Herb drying part 3)

Today, we will be decorating our herb drying rack that we made last time and look at different ways to decorate it. (This is optional)

Before we start, I recommend that you take out any herbs you might have hanging in it. This way your herbs will stay nice and clean while you decorate.

One of the best and easiest ways to decorate your herb drying rack is to spray paint the outside. When you spray paint it is best to do it outside on another piece of cardboard or a tarp and making sure to cover up the inside part of the box because that is where your herbs will hang. This is mostly important if you’re going to use your dried herbs for seasoning in your food. FUN(ish) FACT! Usually when you are spray painting your herb drying rack, you want to add multiple coats of your spray paint until you cannot see any of the marks from your box under it. Here is a picture of a desk organizer I spray painted:

That desk organizer is cardboard!

Another way to decorate your box instead of spray painting is to tape or glue paper around the outside of your box. This is better if you are going to collage or paint the outside of your box. FUN FACT! There are also MANY other ways to decorate the paper you are gluing/taping on! Here is how I did it: (Make sure you decorate your paper before you glue/tape it onto your herb drying rack!)

The last way to decorate your herb drying rack ( That I am showing you, there are definitely other ways) is to use washi tape. In my opinion, washi tape is amazing for this project. You can use it around the edges, you can make stripes, and honestly you can even go crazy with it if you wanted! Here is how I used my washi tape:

Something you might want to do after you put your washi tape down is you might want to either mod podge over it, or put packing tape over it. This way it will keep your washi tape lasting longer and sticking longer. Also it gives a bonus shine! Something you might want to do after you put your washi tape down is that you might want to either mod podge over it, or put packing tape over it. This way it will keep your washi tape lasting longer and sticking longer. Also it gives a bonus shine! Stay tuned for my Flower&Leaf pressing tutorial tomorrow, and my tips and tricks for your decorated new herb drying rack on Friday!

DIY Herb Rack! (Herb Drying Part 2)

Herb Drying part 2

Today we are going to make a drying rack for the herbs we bundled last time! This activity is fun, useful, and can finally give a use to that big cardboard box sitting in your house that you don’t have the heart to throw away.

To dry herbs for their flavor and aroma, you have to make sure that you do not dry your herbs in the sun. Otherwise, the herbs that you are drying might lose their taste and scent. 
Fun(ish) FACT! Some herbs can take up to 3 to 4 weeks to completely dry!

Here is how I made my herb rack:

Taking inspiration from paper bag ideas, I took a big cardboard box, and hot glued bamboo skewers (you could use most sticks) across the bottom half of the box to hang my herbs from. FUN FACT! One of the best ways to dry herbs is to hang them because it allows good air flow between the herbs. Next, I taped the top flaps of the box to provide more shade on the drying herbs.

To make a good use of the extra space, I decided to make a second row at the top of the box with my bamboo skewers. This could also help if you are drying longer herbs. (remember, you can use basically any type of sticks). To start, I made marks where I wanted my sticks to go. Then I started gluing.

While I was hot gluing, I had to make sure that the bamboo skewers were secured firmly at the ends. This is important because if your sticks fall down, all of your drying herbs could get crushed. You can see here that I ran out of normal hot glue so I ended up using some decorative silver hot glue.

Close up of one end of a hot glued stick.

Once I was done gluing all of my sticks in place, I gave them 1 minute to make sure all the glue had dried. After that, all the important parts of the herb drying rack are done!

Now you can put your herbs out to dry on your new herb drying rack that you made yourself!


Keep a lookout for my next post about how to decorate your new herb drying rack tomorrow!

Drying herbs! (Herb Drying Part 1)

Lemon Balm bundle

Yesterday, it was good weather outside, so I decided to harvest and trim some of our lemon balm. To make sure that the cuttings would keep, they had to be dried. FUN FACT! many herbs taste stronger when they are dried! Here I am using lemon balm as an example, but most herbs can be dried like this. 

First, I washed the lemon balm cuttings to get rid of any dirt. Then, after they were dry, I made Bunches of lemon balm cuttings that were about the same size. FUN FACT! Lemon balm is a good herb for making tea! 😋 After that, I took a rubber band (I have leftover rainbow loom bands from craft projects so I used those), and tightly wound them around the top stems of the lemon balm cuttings.

Making bundles using rainbow loom

Next, I took some spare paper clips and unfolded them like this:

( you can use big ones or small ones)

After I had prepared the paper clips, I took one the smaller end of one of the paper clips and slipped it in the rubber band that was holding the steps together, and there you go! Some Lemon balm cuttings (or most other herb cuttings) ready to dry! FUN FACT! Lots of herbs like the mint family, rosemary, etc, like to be trimmed and grow even better with proper pruning! Stay tuned for a post about trimming/pruning herbs!

Keep a lookout for my DIY herb drying rack post tomorrow!