Neem Oil: The Best Way to Eradicate Plant Pests and Diseases Naturally

While there are many different ways to deal with pests on your plants, neem oil is by far the best option for dealing with them. Unlike many other pest treatments available, neem oil is both effective and natural.

According to the EPA, cold pressed neem oil has no health risks as it is derived from plant material. It is also perfectly safe to use on outdoor plants as well as houseplants with no negative effect on the environment or pollinators.

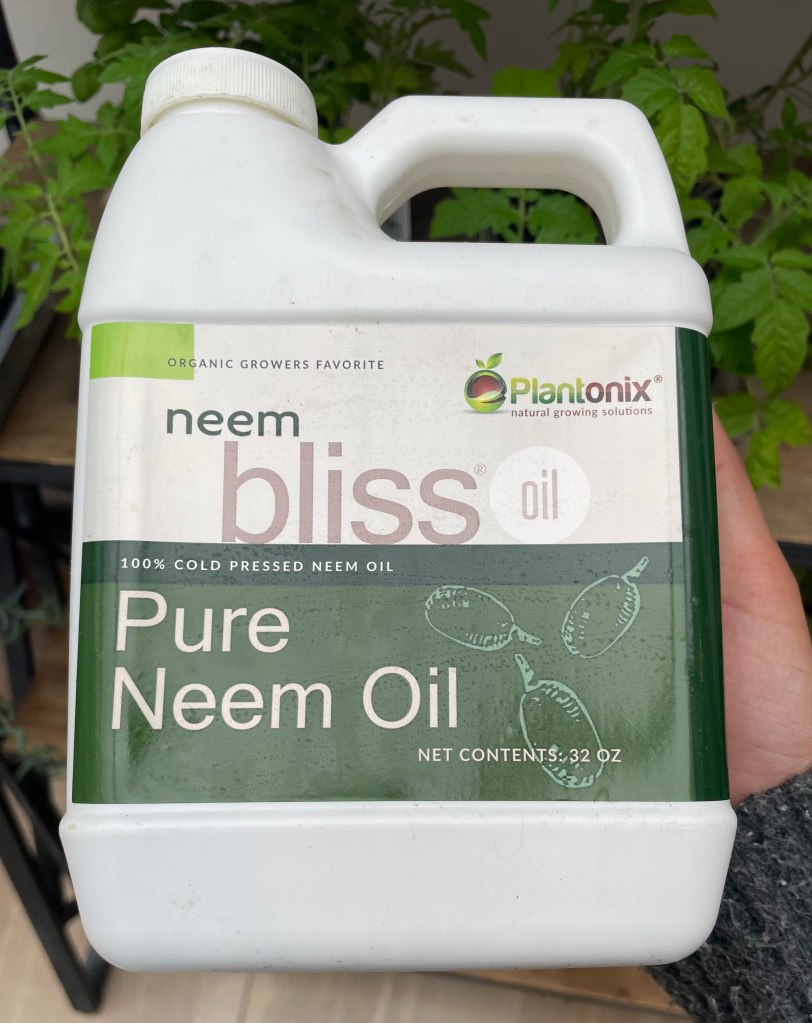
Neem oil can be purchased in a concentrate form or in a pre-made solution. I prefer to buy a concentrated bottle of neem oil and make the solution myself as it saves both money and plastic.

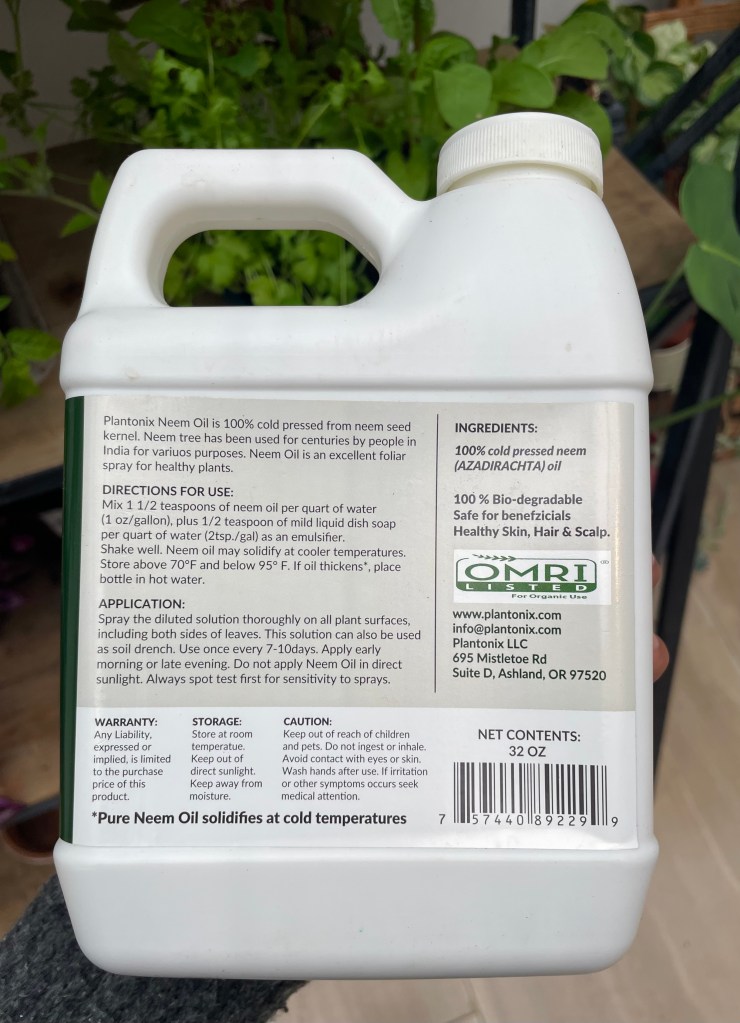
How to make neem oil solution with a bottle of concentrate:

  • Mix 1 1/2 tsp of neem oil concentrate per 1 quart of water
  • Add 1/2 tsp of mild liquid dish soap per quart
  • Shake until both the neem oil and the soap are mixed together with the water

Using neem oil solution is very simple! All you need to do is spray the affected plant down every 10-14 days until the pests have been eradicated. This solution can be used to get rid of or prevent all sorts of plant bugs and pests, including mealybugs, aphids, and spider mites! Neem oil can also be used every two weeks as a preventative or treatment for and mildew diseases (ex. Powdery Mildew).

That is everything you need to know about using neem oil to protect your plants. Neem oil is a great option for both outdoor and indoor plants!

Building an Ikea Greenhouse Cabinet-free printable!

Greenhouse cabinets are great ways to make sure your tropical plants are thriving in their optimal conditions. Learn here how I built my greenhouse cabinet and find useful links and lists for making your own! At the bottom of the post you will find a printable PDF with links to all the materials you need to make your own greenhouse cabinet.

My goal for my cabinet is to create a humid environment for my tropical plants as most tropical plants require humidity levels that are not usually maintained in houses.

The first thing I did was to chose which Ikea cabinet I wanted to transform. There are many different options, but I chose the Milsbo Tall Ikea cabinet in the black color. It is big enough that it will fit all my plants in the years to come, but it will not take up too much space in my plant room. If you are looking for a smaller cabinet, the Ikea Baggebo and Rudista cabinets are good options too.

The next important thing is to get weatherstripping for the greenhouse cabinet. Weatherstripping is an adhesive strip that seals the cracks of the cabinet to retain humidity. If your cabinet is black, then use this black weatherstripping. If it is white, you can use this one. Matching the color of the weatherstripping with your cabinet is not required! This is purely a personal reference.

Another important thing to add is a small fan. Fans will provide air circulation which is important with high humidity in order to prevent fungal and bacterial deseases on your plants. Here is the link to the fan I used.

The most important thing in your greenhouse cabinet will be grow lights! These will provide the light the plants will need to grow. I like and used the Barrina grow lights. Depending on how wide your greenhouse cabinet is, they have 2ft wide ones and 1ft wide ones. the grow lights come in multiple different colors, but the white light is my favorite as they light up a room without being blindingly bright.

If you want to maximize your greenhouse cabinet’s vertical space, consider hanging grid organizers in your cabinet. These will allow you to add extra shelves/space for more plants.

Those are all the materials needed to build a greenhouse cabinet. Attached at the bottom is a free PDF with all the links to the materials mentioned.

PDF:

Plants You Can Grow In Full Sun!

If you still need to pick a spot for a garden or start one, check out this post:

https://tigershakti.org/2022/12/11/how-to-start-a-garden-p-1/

To learn how to measure sun in your garden, check this out: https://tigershakti.org/2022/12/03/how-to-measure-sun-in-a-garden/

If you have full sun in your garden, (6+ hours of direct sun) you are in luck! That means you can grow almost any plant! Some plants you can grow are:

Veggies: Tomatoes, peppers, squash, carrots, radish, peas, kale, onions, garlic, cucumbers, fennel, lettuce, asparagus, Brussels sprouts, artichoke, okra, gourds, potatoes and sweet potatoes, green beans, eggplant, tomatillos, corn,


Fruits: Strawberries, blueberries, raspberries, fruit trees, melons.


Herbs: Mint, rosemary, thyme, lavender, oregano, basil, chives, dill.


Flowers: Rose, marigold, cosmos, daylily, bee balm, black eyed susan, petunia, sunflower, zinnia, dahlia.

Etsy: https://www.etsy.com/shop/SolisandLunaCrafts

Patreon: patreon.com/tigershakti

Youtube: https://www.youtube.com/channel/UC1QsDmyuTX4rtw9tpMLw3xQ

That’s it for today! Check out my Etsy and Patreon!

Sources: https://morningchores.com/full-sun-vegetables/ https://www.gardeningknowhow.com/ornamental/flowers/fgen/full-sun-plants.htm

How to start a garden! P. 1

Check out what plants you can grow in your garden!

With everything that is going on right now, growing a little food to have even a little bit of food security is a good idea. -But gardening has so many other benefits than just producing food. Gardening can help with PTSD, keep you more active, and nourishes your mind and body.

If you live in an apartment, don’t worry. Believe it or not, you can grow a garden even in an apartment! Check out this post to learn how you can grow your own fresh food in mason jars in your home! https://tigershakti.org/2020/05/29/how-to-grow-your-own-indoor-garden-post-1-mason-jar-herbs/

You can start planning and building your garden ANYTIME. Even in the middle of the winter! The first step to starting a garden is to pick out the place you want to put it. The space you choose for your garden should be easily accessible so that you will stay motivated to work in it, and it should be as sunny as possible. If you can, measure the hours of sun your garden space gets. To do this, check out my post on measuring sun in the garden here. https://tigershakti.org/2022/12/03/how-to-measure-sun-in-a-garden/

You can also find out how much direct sun an area gets by buying a sun meter. All you have to do is stick it in the ground in the place you want to measure sun, and wait! Within a day it will tell you how much sun it got. Here is a link to one of those: https://www.amazon.com/Luster-Leaf-1875-Rapitest-Calculat

Now that you know how much sun your chosen garden space gets, it is time to pick the plants that you can grow. Different plants grow better with more or less sun.

If your garden space gets 6-8 hours of sun, that is considered full sun. it means you can grow any plant that loves sun there.

If your garden gets 3-6 hours of direct sunlight a day, it is considered partial shade. You can still grow almost all of the same plants as you can in full sun.

If your garden space gets 2-3 hours of sunlight a day, it is called full shade. You can not grow as many different plants here as you can in sunnier locations, but you can still grow a bountiful garden.

Now that you have your garden space, how much sun it gets, and what plants you can grow, the next step is to plan your garden layout. Stay tuned for that post!

Patreon: patreon.com/tigershakti

Etsy: https://www.etsy.com/shop/SolisandLunaCrafts

Youtube: https://www.youtube.com/channel/UC1QsDmyuTX4rtw9tpMLw3xQ

How to measure sun in a garden!

Different plants need different amounts of sunlight, but how do we find put how much sunlight your garden gets? In this post, we will find out how to measure sun in the garden.

This method for measuring sun in the garden is called a sun log. All you have to do is every couple of hours, take a picture of your garden space. Then, look at which pictures show your garden in sunlight. Then you know how many hours of sun your garden gets. Here is an example:

This is my garden bed around 10:30
This is it at 12:00
My garden bed at 2:30

Using these pictures, I can see that my garden bed gets dappled sunlight at 10:30, and then goes onto shade for the rest of the day. Now what I should do is I should take pictures of my garden bed at 8 to 11 to see exactly how many hours my garden bed gets.

That’s it! Thanks for reading this post, if you have any questions, comment down below and I’ll be happy to answer!

Etsy: https://www.etsy.com/shop/SolisandLunaCrafts

Patreon: patreon.com/tigershakti

Youtube: https://www.youtube.com/channel/UC1QsDmyuTX4rtw9tpMLw3xQ


Plant profiles: Mint (#2) How to make mint tea!

Hello everyone! How are you? I hope you are having a good day! In today’s post, I am going to show you how you can make mint tea with your home grown mint! Let’s get started!

Mint tea is such a good way to warm up in the long winter months. Just imagine making a cup of warm mint tea and curling up on the couch to watch the snow fall. 🙂 We don’t even wait for the cold months to come before we drink mint tea, we drink it in the summer too! Anyways, here are the steps on how to make mint tea.

Step #1: Get your mint.


To make mint tea, you can use dry mint, or fresh mint. The only thing is, when you make mint tea with freshly picked mint, it is not as good as if you make mint tea with dried mint. (So we prefer to make mint tea with dried mint.) Check out some posts I did on how to dry herbs HERE.

The other good thing about using dried mint for your tea, is that you can cut and dry your mint in the summer, and then you can used your dried mint all through out the winter.

Step 2: Warm up your water


We warm up our water to about 190 degrees Fahrenheit.

Step 3: put your mint in!


We like to use these cups for making mint tea for one person, but you can use a tea pot too!

Step 4: Pour and wait!

Once you have your mint in your pot and you water at 190 degrees Fahrenheit, you can pour your how water through the mint into your tea cup/pot till your mint is covered with water.


Now, all you have to do is wait! For dried mint, we like to let our mint steep for about 3 minutes. Feel free to test out different steeping times though!

Finally, once your tea had steeped to the point where you like how it tastes, take out your mint strainer and enjoy!

Garden harvest and how to grow it yourself!

Hi everyone! Today’s post is a garden harvest/garden update post. Enjoy all of the pictures! Let’s get started.

To begin, here is a picture of my harvest!

It is not a HUGE harvest, but its still a lot of food for my family to eat!

Almost all of our harvest came from our container garden, proof for how productive container gardens can be. The part of the garden where we harvested most of our seeds from is the front garden. Here are pictures of some of the plants that we harvested from!

We also harvested a bit of food from the side garden. This garden does not get as much sun as the front garden, but we still get a good about of produce from it! Here are also some pictures of plants we harvested from.

Believe it or not, you can grow this too! Even if you don’t have a raised bed/lots of space to grow in, you can grow your food in containers, like me! If you want instructions on how to grow/start a container garden, check out my small space garden series! Here is a link to the first post:

That is it for today’s post! I hope you enjoyed it and got plenty of inspiration for your garden too! Bye!

Garden vocabulary #1

In this series I am going to explain some of the gardening words that I use in my posts that you might not understand. This first post will be about differing plant needs like sun and water, and the words I might use to explain them. These explanations of garden vocabulary might be different than what they actually mean. This is just how I use these words in my blog posts. Let’s get started!

Sun & Shade Full sun-Means 6 to 8 hours of (direct) sunlight or more Partial sun-Means 4 to 6 hours of (direct) sunlight Partial shade-Means less than 4 hours of direct sunlight Full shade-Means barely any direct sunlight, mostly shade

Water Overwater/ing- Means giving a plant too much water Underwater/ing- Means not giving a plant enough water

Fertilizer Heavy feeders-Means a type of plant needs a lot of nutrients and fertilizer Burning a plant-You can burn a plants roots or shock the plant by giving it too much fertilizer

Planting Transplanting-Means moving a plant from one patch of soil or container to another Shock/Transplanting shock-Means shocking or damaging a plant when transplanting

That is it for todays post! If you have any questions about this post, feel free to comment below! Bye!

Garden bounty!

Over the last few days, we have been harvesting salads, radishes, and herbs from our garden. In this post, you are going to see, that even if you have bad soil, not much sun, nibbling rodents, and more (like us), you can still grow a bountiful garden!

Here is our herb garden:

It does not get full sun and our soil does not drain very well, but look at what we have harvested from it!

(We have containers for most of our plants here to take care of the problem of bad soil. The soil has been loosened where the mint is in the ground.)

As you can see, we even have some lavender plants near this area. On the web, you will see that lavender likes full sun and well drained soil. Lavender plants will do better in full sun and well draining soil, but these plants have neither, and they are still doing fine.

In our mostly greens garden, we made a chicken wire and zip tie cage to protect the plants from animals that will eat them, and tilled the soil to help the plants grow. This space does not get full sun, but it still gave us a good harvest. In the summer heat, lettuce will bolt (when a plant starts to flower and their leaves taste bad) pretty quickly, so in this scenario, the shade might help. There is mostly bok choy (a plant with edible leaves) right now, because we harvested and pulled out the other plants, (they were bolting) and started seeds in the bare spaces.

These places in the garden that I showed you today are not the best spots for gardening, but we still have managed to get a bountiful harvest from them. Here are some of the things we will/have done to maximize our harvests. Firstly, we water our plants everyday, because in the summer/late spring heat, the soil will dry up very quickly. Also, every week or two we will fertilize our plants. This is especially important if you are growing your plants in containers or poor soil. Another thing you can do to get good harvests from your plants is to spray your plants with neem oil. Neem oil is an oil that keeps away or kills many plant bugs.

Keep in mind that many of these plants will do better in full sun and well drained soil if you can plant them in those conditions, but if you don’t have lots of sun or good soil, do not let that keep you from growing a garden! Bye now!

Home grown beans! (Grown in a partially shaded area!)

Indoor gardening!

when the cold wind blows and the frost comes, you can still grow tasty veggies inside your own home! This series will show you how you can make yummy salads and more in dead winter. Let’s get started!

First you need to choose a veggie to grow. If you are just starting , it is best to start with lettuce. Lettuce is super versatile and hardy. And they do not need a huge container to grow in.

Once you have your plant that you are going to grow, get your container. If you are growing lettuce or leafy greens. You do not need a super big container, as even a large plastic party cup will do. If you still need to get a container, you can start your lettuce seeds in a egg carton or a empty toilet paper roll. I will soon do a pot on how to use those to start seeds.

To plant your seeds, gently sprinkle your lettuce seeds over the surface of the soil, and then very lightly mix them in with the top layer of soil. Keep in mind that lettuce seeds need light to germinate or sprout.

Once you have started you seeds, after a couple of weeks, transplant them into their main container. And start harvesting the bottom leaves of the lettuce plant. Enjoy!

I hope you liked this post! Please check out our other posts. Thanks!